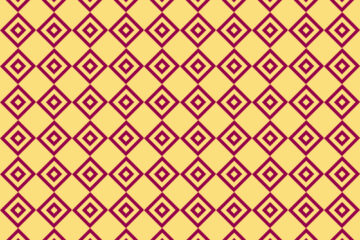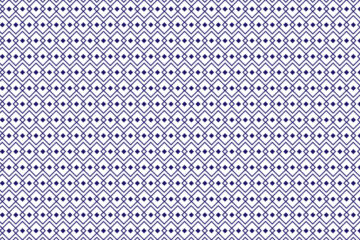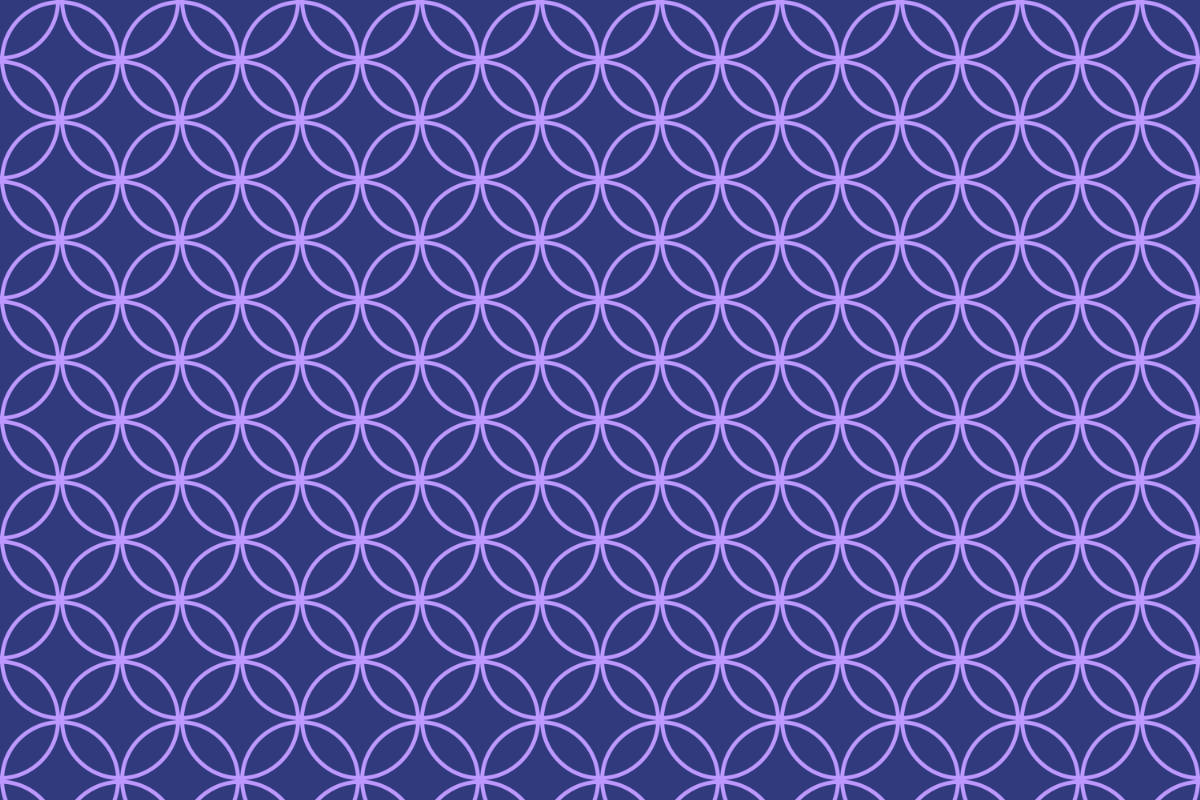
In the following step, you will learn how to make seamless repeating geometric patterns in Adobe Photoshop. Here are the steps to make seamless repeating geometric patterns, I will also leave the video below so you can have a better idea and see how I create seamless repeating geometric patterns. Open Photoshop and let’s get Started.
How do you make new documents for patterns?
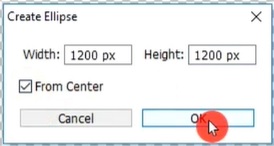
For creating a document hit on the File menu then select new, where width is 1200 and height is 1200 pixels, Resolution is 72 pixels, the color mode is RGB, and the background content will be transparent then click ok.
Also, read: https://texhype.com/how-to-create-polka-dots-patterns-in-adobe-illustrator/
How do you create seamless repeating geometric patterns step by step?
1. Go to the rectangle tool and here select the ellipse tool, now click on the canvas, to create an ellipse where width and height are 1200/1200 pixels, set the stroke color it will be black and the stroke width will be 40 pixels, then click the move tool and align your shape in the middle of the canvas.

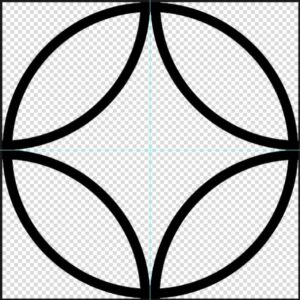
2. Now add a ruler guide horizontally and vertically in the middle of the ellipse, after that duplicate the layer 4 times, select one by one layer, and place it on the top right side, bottom right side, and top left side, the bottom left side of the ellipses which is divided in four part through the ruler guides.
4. In this step go to the edit menu here select define pattern and save it.
5. Now again go to the file menu and create a new document, Here width and height are 1200/800 pixels, the color mode will be RGB, and the background contents will be white, then click Ok.
6. Go to the layer panel then unlock the layer, then click on the new fill and adjustment option, here select pattern now click the drop-down menu and select the pattern which you recently saved, and set the pattern scale its 10%, then click ok.
7. Again go to the layer panel and click on the new fill and adjustment option, then select solid color. and now select a color which you want, then click ok. Then Right click on the color fill 1 layer here select create clipping mask, now Select background layer, choose a color for the background, and apply it.
Now the pattern is Complete