In the following step you will learn how to make Chic pattern in Adobe Photoshop.
How do you make new document for your pattern?
For creating a document go to file menu then select new, where width 600 and height 600 pixels, Resolution -72 pixels, color mode -RGB, and the background content will be transparent then Press ok>
How do you create a very first Chic shape?
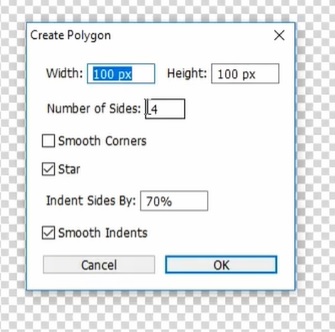
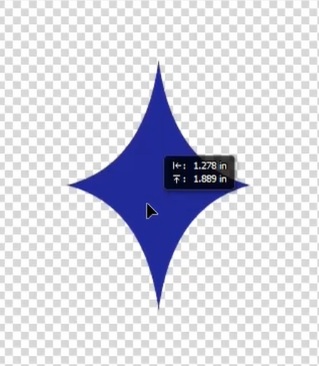
1. Hit on the rectangle tool and select polygon tool now click on your canvas and set polygon shape details. Here width and height value is 100/100 pixels, number of sides will be 4, check on in star section, indent sides value will be 70%, and check on in smooth indents. Then click ok.
2. Now press Ctrl+ T and enlarge the shape, then again select polygon tool and change fill color for the shape, now select a color which you want.
Also read: https://texhype.com/how-to-create-rhombus-pattern-in-adobe-photoshop/
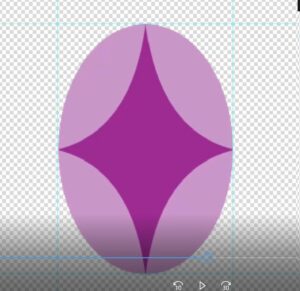
3. Again go to rectangle tool and select ellipse tool, here ellipse size will be the same as polygon (Diamond) shape size. Now set ellipse fill color. Give a color which is light shade of polygon filled color, now go to layer panel select polygon layer then drag up on to the ellipse layer. Now move to the polygon shape in the middle of the ellipse shape through move tool.
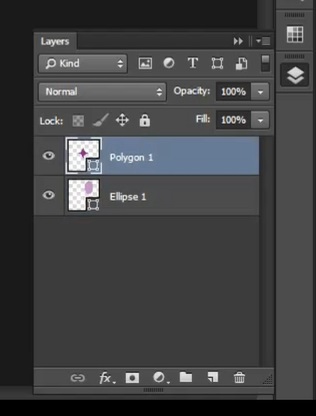
4. After that set ruler guide vertically and horizontally around to the shape. Now go to layer panel and select both layer then right click on the shape and convert it to smart object. Here our very first Chic shape is ready.
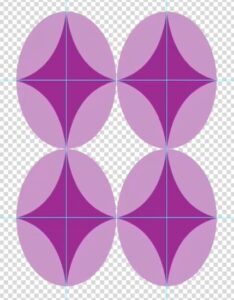
5. Now press Ctrl+ J (3 times) for duplicate Chic shape, now place other 3 shape side and lower portion of the shape then set ruler guide on the middle portion of every shape. After that select rectangular marquee tool and select repeated pattern area which is middle portion of 4 shape and guided by the ruler guide.
6. Now click on the edit menu, then select define pattern and save the pattern. After that Open a new document, Here width and height is 1200/800 pixels, here color mode will be RGB, and the background contents will be white, then click Ok.
7. Again go to layer panel then open the layer lock, then click on the new fill and adjustment option, now select pattern, aftern selecting pattern click drop down menu and select your pattern which you recently saved, here set pattern size mine is 30%. Now click ok.
8. After that select color picker tool and pick the deepest color from your pattern. Now select your background layer and select paint bucket tool then fill that color which you pick through the color picker tool.
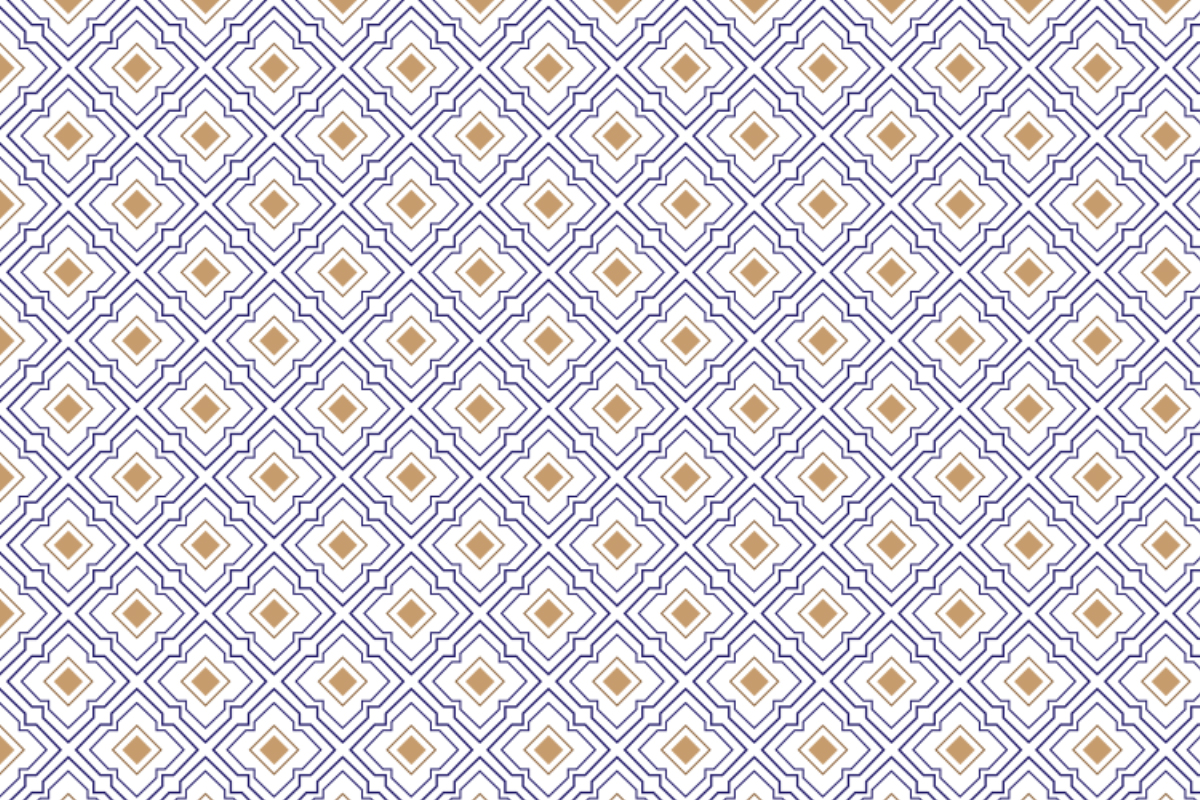
Now the pattern is complete